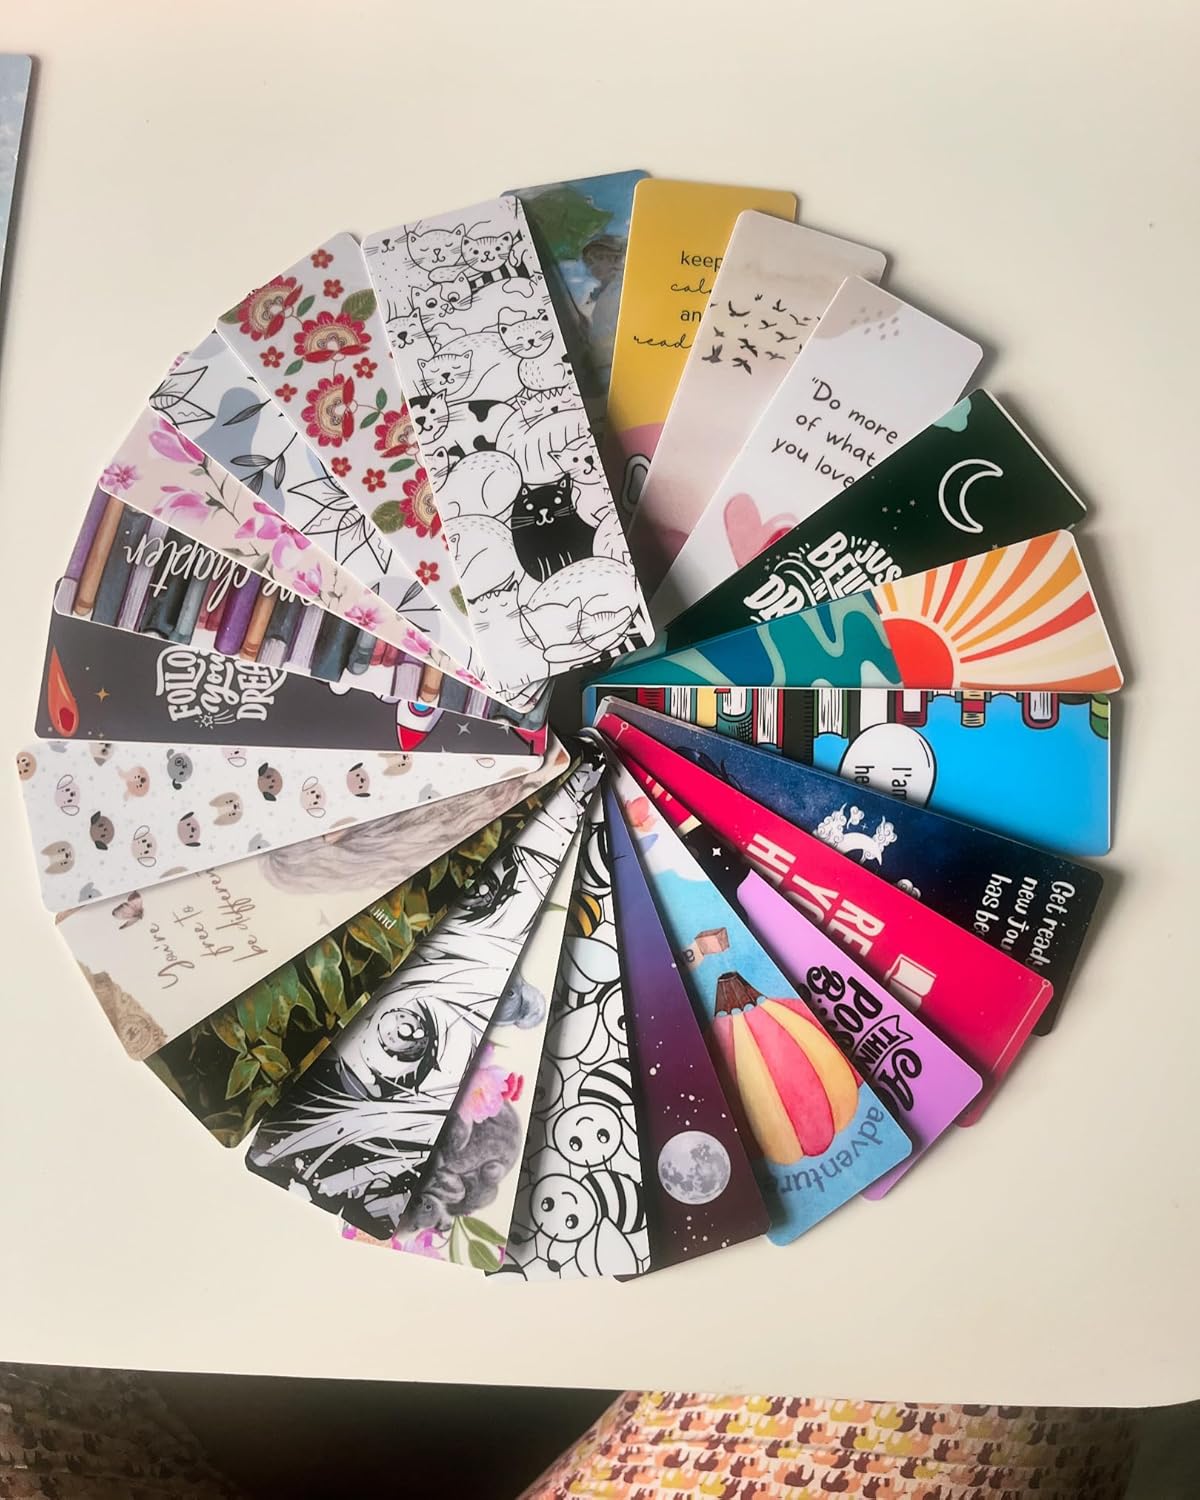
The Ultimate Guide to DIY Bookmarks
Written by a Bookmark Lover Turned Bookmark Maker
I’ve been collecting bookmarks for as long as I can remember. It started as a casual obsession when I was 19—every time I grabbed a new book, I had to find the perfect bookmark to go with it.
You know, one of those small pleasures in life: finding the right one that matched the vibe of the book, the color of the cover, or even my mood that week. I didn’t even realize that what began as a quiet hobby would turn into a full-blown business, making non-tearable bookmarks.

Yep, it’s a thing now—tough bookmarks that survive all your bookish adventures.
Let’s be real, though.
Bookmarks aren’t just a strip of paper we slide between pages. They’re personal, a mini expression of who we are as readers. And if you’re anything like me, you’ve probably spent too much time looking for that perfect bookmark, only to end up thinking, “Why don’t I just make one myself?”
If you’ve ever felt that way, you’re in the right place. I’ve spent years not only collecting bookmarks but creating them—and now, I’m about to share everything I’ve learned. Ready to dive into some DIY magic?
Why Make Your Own Bookmarks?
Let’s kick this off with a question: why not just buy a bookmark?
Here’s my take: making your own gives you creative freedom. You get to choose the design, materials, and theme. Plus, it’s a great way to put your unique personality onto something that stays with you as you flip through pages.
And here’s the kicker—it’s incredibly cheap.
If you’re a DIY enthusiast or just someone who loves books (and we all know the cost of books isn’t exactly light), creating your own bookmarks is a great way to personalize your reading experience without adding more cost.
Materials You’ll Need for DIY Bookmarks
You don’t need a fancy toolkit or anything complicated to get started. Here’s a simple list to gather:
- Paper: Scrapbook paper, cardstock, even old magazines. Anything thick enough to hold its shape.
- Fabric: For those wanting a softer touch, fabrics like felt or canvas can make great bookmarks.
- Recycled Items: This is my personal favorite. Old postcards, packaging, or pieces from old, unusable books (the irony, right?).
- Tools: Scissors, glue, and a hole puncher. If you want to get fancy, a laminator and some ribbon or thread can add that extra touch.
If you’re in the mood to go eco-friendly, you can use recycled materials for a unique, personalized touch.
The best part? You probably have everything you need lying around at home.
Step-by-Step Guide: Creating Your First DIY Bookmark
Ready to roll up your sleeves? Let’s walk through a basic DIY bookmark that anyone can make, even if you’re all thumbs when it comes to craft projects.
Start with a base: Take a thick piece of cardstock or recycled cardboard. Aim for a 2x6 inch rectangle—this is a standard bookmark size, but feel free to play around with the dimensions.
Add your design: Whether it’s a quote, doodle, or simply a splash of colors, go wild! You can paint, draw, or glue on magazine cutouts. If you’re like me and love a good bookish quote, find one that resonates with your current read.
Protect it: If you want your bookmark to last longer, especially if it’s paper, consider laminating it. You can also just cover it with clear tape for a quick fix.
Add a final touch: Punch a hole at the top, thread a ribbon or yarn through it, and voila! You’ve got a personalized bookmark ready to hold your place.
Unique DIY Bookmark Ideas
The beauty of DIY is the flexibility. No two bookmarks have to be the same. Here are a few of my personal favorites that will make your reading experience even more special:
- Pressed Flower Bookmarks: Use flowers from your garden, press them between books for a few days, and glue them to your bookmark. Laminating these can give them an elegant, preserved look.
- Fabric Bookmarks: Grab old scraps of fabric and glue them onto a piece of cardstock or sew around the edges to create a soft, textured bookmark.
- Themed Bookmarks: If you’re reading fantasy, why not craft a bookmark that looks like a sword? Or for romance novels, a bookmark with hearts and floral designs.
Also Read: DIY Bookmark Ideas for Every Kind of Reader
Printable Bookmark Templates
Not everyone wants to spend hours creating something from scratch, and I get that. Printable bookmarks are a great way to get the DIY experience without the hassle.
I’ve got a few free templates you can download and print at home. Just pick a design you like, print it on sturdy paper, and you’re set.
Here’s how you can customize them:
- Add a personal touch with some color or glitter.
- Print them on colored paper for a unique look.
- Or, if you’re feeling extra crafty, print them in black and white and have your kids color them.
Also Read: Printable Bookmark For Kids, Adults & Booklovers
Turn Your Hobby into a Business
Here’s the thing: my bookmark journey didn’t stop at DIY.
I started small, crafting bookmarks for myself and friends. Eventually, people started asking if they could buy them, and that’s how my non-tearable bookmark business was born.
If you’ve ever thought about selling your DIY creations, bookmarks are a great way to start.
Here are a few tips if you’re thinking of selling:
- Start online: Use platforms like Etsy or even Instagram to showcase your work.
- Offer custom designs: People love personalized gifts, and bookmarks are perfect for that.
- Market to book lovers: Target audiences that frequent book clubs, libraries, or niche literary groups.
Wrapping Up
There you have it, folks—a crash course on making your very own DIY bookmarks.
Whether you’re doing it for fun, gifting them to fellow book lovers, or looking to start a small business like I did, there’s something magical about creating something personal and practical. The best part? You can make your bookmarks as simple or as fancy as you want.
So, what are you waiting for?
Grab some materials, unleash your creativity, and start crafting. Trust me, once you get into it, you won’t be able to stop.
And hey, if you’re ready for something more durable, check out my non-tearable bookmarks—I guarantee they’ll last through all your page-flipping adventures!


