How to start a self-hosted newsletter in 2021?
2020 was harsh for all of us, in one way or the other. But what's a bad year if we don't learn something out of it. Right?
Even I learned something, or I should say I rediscovered something - my love for writing during this pandemic. And that made me start my very own newsletter.
I know you’ve been trying to build something, too. So, I thought of sharing my experience, learning and insights about creating a newsletter from scratch.
This is not about planning, or marketing or preparation. It is an actionable road map of what I did and what should you do too, if you’re not a fan of building your castle on someone’s land.
Table of Contents
- Why I started a newsletter?
- Things You Will Need to Start
- My Technology Stack & Costs Involved
- Step-by-step breakdown
- Find a reason for starting a newsletter
- Get Closer to Your Reader
- Think of a broad theme of topics to cover
- Finalize a name and story
- Create the design assets
- Buy a domain name
- Write down copy for landing page
- Bring design and copy together (Design Landing page)
- Set up sign up form
- Link your sign up form to a new email list
- Set up auto responder for the list (welcome email on sign up)
- Set up a back end CMS for publishing and management
- Connect CMS to Hosting
- Add a link to past editions on landing page
- Make everything live and show it to the world
- The Result
- That's all pal! The ball's in your court now
Why I started a newsletter?
For years, I silently worked as an elf hidden from the public eye, creating piece after piece for Santa. Everyone knew I was there, but just like millions of other elves (ghostwriters) who create gifts(blogs, articles, Emily, etc.) for Santa (client) to deliver value, happiness and/or wisdom.
Today, I am happy to be the Santa Claus of my own story. I am no longer faceless but write directly for my community that I was slowly building for the past year or so.
And even if I am an elf, I no longer need Santa (medium- social media or blogging platform) to deliver my message. I decide what, when and why to publish, without having to care about pleasing the algorithms.
I don’t hate algorithms and social media, but I love writing and connecting with people more.
I wanted to own the medium where I was writing. Simple. I didn't want to dilute my thought and reach/connect with people at the same time. I might not get the reach I got on LinkedIn or Medium but I am happy with what I have.
Things You Will Need to Start
- Dedicated domain name
- Hosting server
- Landing page builder for newsletter landing page
- Backend CMS for hosting previous editions
- List management & email marketing solution
- Branding Kit (Name, logo, etc)
- Graphic Design Tool for creating logo, newsletter banner, etc.
My Technology Stack & Costs Involved
| Need | Tool Used | Cost |
| Domain Name | Namecheap.com | INR 100/year |
| Hosting | Netlify | Free |
| Landing Page Builder | Carrd.co | INR 750/year |
| Backend CMS | Publii CMS | Free |
| Email Marketing | SuiteDash | INR 6000 (Lifetime Deal) |
| Design Tool | Crello (Canva Alternative) | Free |
Pro-rata cost of running this newsletter (Proportionate Costs of Using the Tools) = INR 100 + INR 75 + INR 600 = INR 775/- for one year
Step-by-step breakdown
Now that I've outlined the basics, let's look at all the steps I took to come up with an idea, plan, execute and launch my newsletter- FreelanceBytes.
The steps are just an indication of what you must do. You can take a completely different direction altogether. (If you do, don't forget to share your path with me )
Find a reason for starting a newsletter
The reason to do something is really important for me. I've always believed that if the reason isn't strong enough, the goal gets hazier and the journey is sloppy.
Well, I've already shared my reason- I wanted to write for the reader and not the medium. I shared whatever I knew about freelancing on social media (LinkedIn) and Medium earlier but I wanted to build a personal connection.
Also, I love to talk to people who are on a similar journey. So, I already had the audience in mind. I just had to create a structure to share something every week.
Get Closer to Your Reader
You should always check the depth of water before diving in. I was planning a freelancing newsletter. There are thousands (maybe millions) out there.
I saw what was already present and I was able to decide how I want to plan my newsletter.
To find the common struggles, I got active on LinkedIn in March 2020. My sole aim was to get closer to the freelancing community and see if I can offer something from whatever I know. Almost every week since April 2020, I got on calls where the idea was to discuss something valuable about freelancing.
This activity gave me enough questions to share answers for the next few months. I took a personal route (thanks to the lockdown), you can think of doing secondary audience research for the same too.
Read More: How to Research Your Target Audience
Think of a broad theme of topics to cover
By the end of September 2020, I was quite sure about writing on freelancing from my personal experience. I had already been writing about it on Medium and saw that many people wanted real experience and insights rather than generic advice.
So, my underlying theme was- realistic & practical freelancing gyaan.
This was a result of many iterations - hacks around freelancing, how to manage freelancing career, tips and tricks to grow freelancing income, etc.
I realized that I don't want to make the newsletter about a 'blueprint' but rather the concepts that I discovered and refined over the years. I also wanted to debunk general myths around freelancing. This would give the readers a basic idea which they can mold as per their own personality and convenience.
If you want to do this for the long term, you will also have to plan a broad theme and ensure every edition sticks to this 'big picture'. When you have the picture in mind, you'll be able to hook your readers week after week even when you're talking about the same topic .
Finalize a name and story
This step should compliment all the previous steps. As you are talking to your readers (or doing audience research) and creating broad themes, document your story. The reasons that drive you should be a prominent part of the story.
Also, discover the pain points (or apprehensions) your readers have and see if you can address them in your story.
My simple motto was to debunk myths and share practical freelancing gyaan in snippets (not all at once).
So, I kept the name as FreelanceBytes.
My story: I wanted to share whatever I learned with others who are on a similar journey and might be facing the same questions that I faced.
This cleared a lot of things before things even started taking shape.
Create the design assets
Now the exciting part begins - giving shape to whatever you've researched. By this time, you would get deep insights on what your readers want, you would have a story and a name with you. All you need to do is tie it all in a common thread.
You would need at least 2 things to start with:
1. Logo
2. Newsletter Banner Design
I used Canva and Crello exclusively for the logo and the banner design. In the logo, I wanted to share a common thread with my own logo (Anmol Ratan Sachdeva).
For those of you who don't know, my logo has 4 colorful rectangles stacked in the form of a pyramid, one over the other.
Each rectangle depicts something from my work and my personality.
1. Yellow: Consulting
2. Purple: Writing
3. Green: Marketing
4. Red: Freelancing
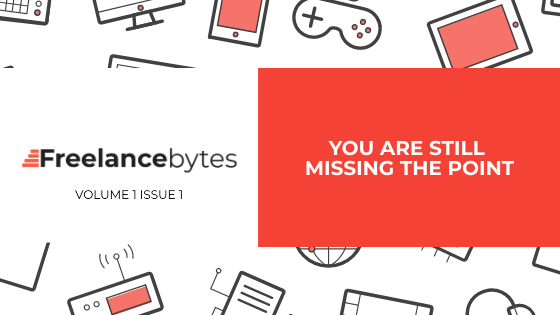
As FreelanceBytes was about freelancing, the color palette was easy to finalize. I wanted to keep it simple and align it in my entire story.
So, I used the same font family as my own logo (Montserrat) and added the word bytes after freelance along with a red pyramid alongside.

The red pyramid shows the steps to freelancing and the clean typeface shows the name. It took me multiple iterations to finalize this. (This was not a one-time thing) But I am quite happy with the idea.
Now, I had to finalize the banner. I wanted to standardize the banner to create a recall and kept it simple with just a background where many digital assets/gadgets are scattered (like a freelancer's desk)
Buy a domain name
Every newsletter should have its own website.
— Anmol Ratan Sachdeva (@arsachdeva) November 26, 2020
Thinking while planning the same for FreelanceBytes
My #buildinpublic journey begins.
My newsletter journey started with this tweet. I firmly believe if you are starting a newsletter, it should have its own address on the internet.
Of course, you can start with the Substack subdomain but here we're talking of a self-hosted newsletter. So, you'd need a domain for it. If you want, you can even use a subdomain of your existing website e.g. newsletter.yoursiteaddress.com.
I bought the domain freelancebytes.xyz from Namecheap.com and got it for just INR 75 for a year. (Cheap, isn't it?). I won't go deeper into the details here as we all know how to buy domain names. :)
Create landing page copy
This took me quite some time. I'd say a couple of days. I wrote multiple variations for the landing page. (It's right! We're rarely satisfied when we write for ourselves)
My idea here was to just link the whole positioning to the newsletter. I wanted to stay quirky and show that my newsletters won't bore the reader. Hence, the tagline:
'Gyaan that won't make you yawn'
I used the theme of alphabets (xyz in the domain name, something beyond the ABCs of freelancing) with words I wanted my newsletter to be associated with - practical, quirky and realistic (PQR) and experience, fixes, gyaan and hacks (EFGH). You can check these on the sign up page for FreelanceBytes.
Apart from the main sign up page, I created the copy for two more pages + the thank you message.
Each copy highlights something from the essence of FreelanceBytes.
Bring design and copy together (Design Landing page)
Once you've finalized a visual identity and the copy, it's time to start building the landing page. I used Carrd.co as my landing page builder because I just needed a one-page website for my newsletter.
I liked using Carrd for the simplicity and templates. I know the pains of building a webpage using WordPress (especially when you're not a designer/developer).
With Carrd, I didn't face any issues. The templates, the flow and the output were amazing. And you know the best part? I didn't have to think about page speed optimization, OpenGraph tags or Meta Tags. It helped me configure everything inherently.
I created a simple sign up page with not much - just a sign up form and a little bit of info about what it is.
I added three links on the page for readers who wanted to know more and read the newsletter before signing up.
You must not forget that most people would like to read past editions before giving you their email IDs. So, if you are starting a self-hosted newsletter, you'd need a back end CMS to publish the archives (past editions).
I will discuss it in the coming pointers.
Set up sign up form
This is easy. Most email marketing software has a sign up form to add subscribers to your list automatically. I am using SuiteDash's email functionality for this which comes with forms (They're not the best but do the trick)
If you are planning to use Mailchimp for list management and email marketing, here's a guide to embedding a sign up form on a web page. The basic steps are the same for all the service providers.
Link your sign up form to a new email list
When you set up a form in Mailchimp or any other email marketing tool, it asks you to link the new submissions or sign ups to an email list automatically.
This automatic list building workflow has been the standard for years and there's not much you have to do here.
Just a word of advice. If you write about multiple topics on your blogs, newsletters and other websites, it is advisable to have a segmented list - every niche should have a separate list (and different sign up forms).
This will help you to understand your audience and further personalize your emails and newsletters.
I have a separate list for freelancers which I started building with this newsletter. It is different from my blog subscriber's list (I don't want business owners to receive freelancing newsletter in their mailbox from me).
Once you set this list and embed the form on your sign up page, you're ready to start getting readers for your newsletter.
Set up autoresponder for the list (welcome email on sign up)
When I started this newsletter, I intentionally didn't use automated responders. I wanted to connect with my early readers on a one-to-one basis. (Though almost all my early readers were already in touch with me on LinkedIn for months).
But at some point, we all have to use an autoresponder. (I still try to reply to every response I get within one hour)
A welcome email tells the subscriber that their email got into the right list and what they can expect from the newsletter.
Here's a snapshot of my welcome email for FreelanceBytes:
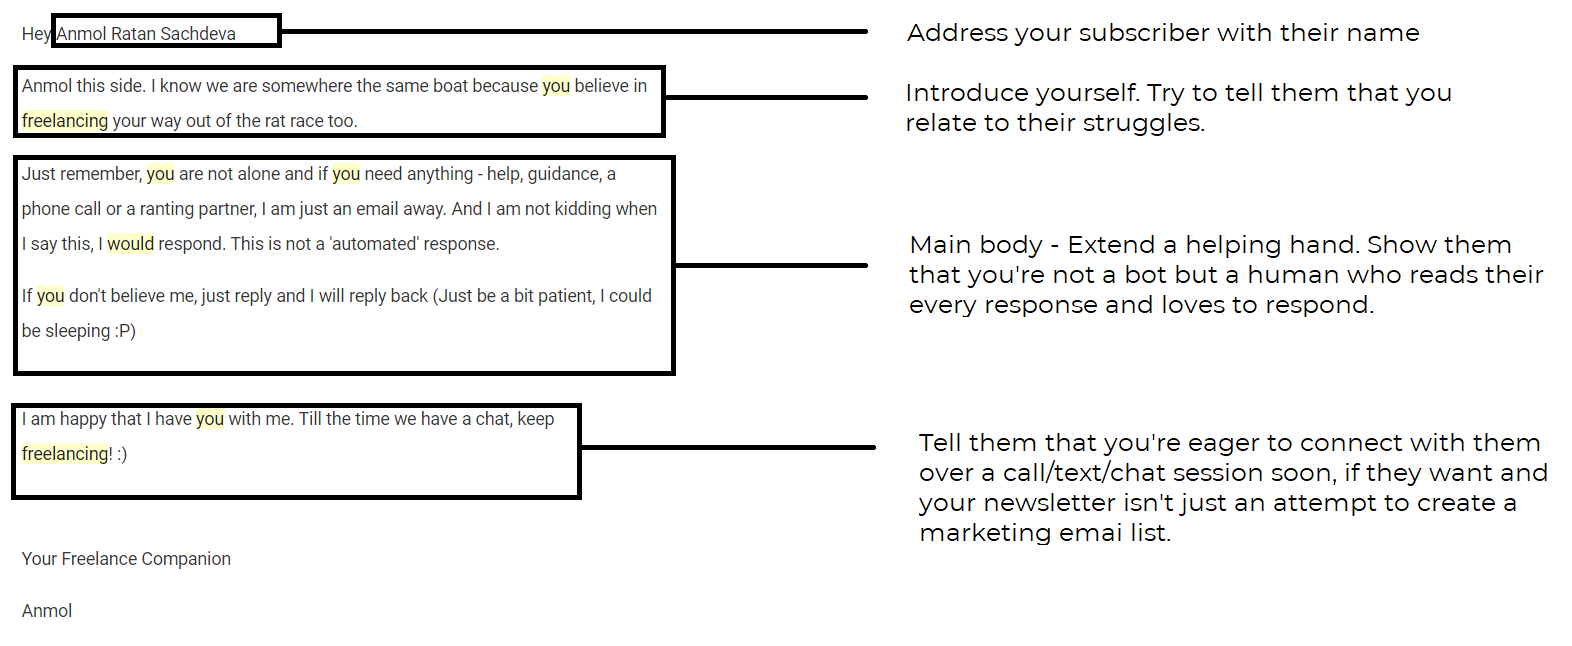
Did you notice something here?
I am trying to initiate a conversation with every reader that subscribes to my newsletter. There are two reasons for that:
- I want them to know I am not an automated bot but a human
- I want them to reply to my first email so that my next emails are not marked 'unimportant' by mailbox algorithms (You don't want your newsletter to land in the promotions tab in Gmail, or worse, in the spam folder)
I am not lying when I say that I respond to every reply I get. As I said, I try to reply within the first hour. (Though, I've failed at it a couple of times).
The whole point of an autoresponder is to create a personal connection. Remember, you have to build a relationship with the reader to run a successful newsletter.
Set up a back end CMS for publishing and management
When you self host a newsletter, you can't ignore having a CMS (for hosting previous editions). I've seen many people use their WordPress blog for the same purpose.
That's actually a neat way but if you want to keep your newsletter separate from your blog (say you're targeting a different niche or micro-niche with your blog) then you will have to set up a CMS for your newsletter.
Before hosting my newsletter separately, I was also using my website to host past editions. I created a separate category for newsletter and hid it from the main blog, linking it to a separate page. But I wasn't happy with the arrangement.
So, I started searching for options.
First, I thought of using Notion to host my archives. If you don't know, you can host entire websites on Notion and even add a custom domain to the Notion Page. All of this for free.
But I wasn't entirely happy with Notion. There's no problem in hosting on Notion but I wanted more control over the reading experience. So, I went to my second alternative - a static CMS called Publii.
I knew Publii static CMS for a while but was skeptical to use it for a live project. But as it is a static CMS, it meant fast speed for the website I'd host. That was it. I thought why not try it.
For those who don't know, it is a desktop app like MS word that allows you to create a whole blog on your laptop. Link it to a hosting server and you can host a blog. The best part- it is more secure and faster than WordPress.
I used the editorial 2.0 theme for my newsletter archives (loved the plain layout) and created a subdomain (read.freelancebytes.xyz).
Every newsletter edition is a post on the subdomain which I write on Publii and sync every time I release a newsletter.
I know there's this extra step - to sync to the subdomain and send separately via my email marketing client to the readers but I found a solution to this too (which I've shared later in this blog).
Connect CMS to Hosting
For hosting my newsletter, I am using Netlify. Netlify is free to use for hosting static websites (one more reason to go the static route).
Here's the process if you're wondering how did I connect my website domain to netlify and Publii CMS:
- Sign up on Netlify
- Create my first website (It was just dropping a folder with empty index.html on Netlify dashboard)
- Create a DNS record 'read' on Namecheap under advanced DNS and redirect it to my temporary Netlify domain (which I got when I created my website on Netlify)
- Add Netlify server details in Publii desktop software to connect it all together
If all of this seems confusing to you, here are a few resources:
- Official Documentation from Publii
- Youtube Video to Connect Netlify to Namecheap
- Youtube Video about Connecting Netlify to Publii
Add a link to past editions on the landing page
Okay! I think by this time you'll have a lot done. All you need is to add a little link to your newsletter archive on your landing page. (I did mine by taking inspiration from Substack in the form of 'Read it First').
Once you create a hyperlink to your archive on your landing page, you're done with the process.
Remember, your link to past editions should be ideally below your sign up form. It shouldn't be hard to discover for the potential subscriber. And don't forget to tie every edition back to your landing page.
Make everything live and show it to the world
That's all. Once you have followed all the steps, all you need is to make everything live.
You might want to setup DNS configuration and add some CNAME records in your domain provider dashboard. If you have used carrd to build your landing page, it will assist you in adding a custom domain to the carrd landing page.
Similarly, you will have to add a DNS record for your archive (I talked about it under CMS backend). Once, you're done with it, you are good to go and share the news with the world. :)
The Result
As I said, this pandemic made me start my own newsletter for freelancers. I am proud of what I pulled-off.
The above process took me approx 15 days to plan and 7 days to execute. I was documenting my journey along the way on Twitter.
Every newsletter should have its own website.
— Anmol Ratan Sachdeva (@arsachdeva) November 26, 2020
Thinking while planning the same for FreelanceBytes
My #buildinpublic journey begins.
Here's the final result:
- Landing Page: www.freelancebytes.xyz
- Archive Page (Past Editions): read.freelancebytes.xyz
I know it's not the best but it is something I built on my own, with little knowledge of coding and building things online from scratch.
There are several incremental additions I am doing every week and I believe that in a few months, this would be flying high among the best newsletters in terms of content experience for the end reader.
That's all pal! The ball's in your court now
I shared everything I learned along the way on my journey to launch a self hosted newsletter here. There are many elements that I might have missed but I will keep updating this on the go.
In my next blogs, I will share my marketing plan, how to promote your newsletter and how to actually gain initial traction in terms of mentions, social shares and more. It will take me some time to come up with numbers to substantiate my claims, till then I hope you are done building your newsletter. :)
If you pull this off and have a self hosted newsletter, don't forget to share it with me on my email (contact@arsachdeva.com).
All the best!
Want to keep a copy of this blog handy?
Download it as an eBook Now (No EMAIL Required to Download)